Taking Payments with GuestPoint Pay
Quick Answer: This article covers taking payments with GuestPoint Pay (GPPay).
There are two main ways to take payments with GPPay on GuestPoint:
1. MOTO transaction through GuestPoint Pay - Using the "Charge" button in the "Make Payment" screen of a booking
2. Integrated EFTPOS Terminal if you have opted for the terminal option with GuestPoint Pay - Using the "Send to EFTPOS" button in the "Make Payment" screen of a booking
Other integrated options with GuestPoint Pay are available such as following:
3. Sending Payment Links through GuestPoint Pay - Sends a payment link to your guest's email & allows your guest to pay for their booking (past, current, or future booking).
Saves you time by allowing guests to enter their own card details.
This option offers improved fraud & dispute protection: Uses 3DS 2.0 secure technology and functions as a "guest-initiated transaction" and not a "merchant-initiated transaction"
4. Putting GuestPoint Pay on your GuestPoint Booking Engine - Allow your guests to pay for their booking at the time of booking.
This option offers improved fraud protection: Uses 3DS 2.0 secure technology and functions as a "guest-initiated transaction" and not a "merchant-initiated transaction"
Two Main Methods of Taking Payments - MOTO & EFTPOS
GuestPoint Pay has two main methods of taking payments.
When GPPay is first enabled for your property, you will see a few additional new buttons on the "Make Payment" screen of a booking: such as the "Charge" button (for MOTO), or the "Send to EFTPOS" button (for integrated GPPay Terminal).
1. Integrated MOTO - "Charge" Button - This method is similar to manually inputting a purchase amount and card details on a Non-GuestPoint Pay EFTPOS Terminal, but it is far quicker with GuestPoint Pay.
As long as you have a credit card saved against a booking, you can click one simple "Charge" button on the "Make Payment" screen of a booking.
As long as you have a credit card saved against a booking, you can click one simple "Charge" button on the "Make Payment" screen of a booking.
The "Charge" button is the biggest advantage of GuestPoint Pay. It saves you immense administration time with manually inputting card details & purchase amounts and reduces manual entry error.
Added bonus is it will show the last 4 digits of the card used in the "Description" of the GPPay transaction which shows accordingly on the Room Account.
Added bonus is it will show the last 4 digits of the card used in the "Description" of the GPPay transaction which shows accordingly on the Room Account.
This is very handy for both internal reference and external guest reference - providing transparency on which card was used for the GPPay transaction.
2. Integrated GPPay EFTPOS Terminal - "Send to EFTPOS" Button - If you have opted for the terminal option, the GPPay EFTPOS Terminal functions on an integrated mode where all purchases & refunds are initiated FROM GuestPoint. You do not enter a purchase amount ON the terminal itself anymore. Reduces manual entry error.
In addition, the biggest difference to regular terminals is ours is a paperless option. The EFTPOS receipts are recorded electronically on GuestPoint itself and saved in PDF format to the booking. These receipts can be emailed at the same time as a Room Account for your convenience & saves you paper.
Method 1 - Charging a Card with the "Charge" button - MOTO
The first method of taking a payment with GuestPoint Pay is charging a card with the "Charge" button in the "Make Payment" screen.
This "Charge" button functions the same as a MOTO transaction on a regular EFTPOS terminal.
The advantage with GuestPoint Pay is it is far quicker than the regular manual method, as we have integrated the MOTO purchase option into GuestPoint itself.
This method relies on the Credit Card Vault built into GuestPoint. If you have a compatible GuestPoint Pay card (Visa, Mastercard, AMEX) saved against the booking itself, you will be able to use this method.
Step by Step
1. On the "Make Payment" screen of a Reservation, you will see below screen if you have saved a card against the booking.
2. Click into the "Charge" button shown above. It will change to "Charge Visa" or "Charge Mastercard" accordingly dependent on the card type.
3. Once you click the Charge button, a "Successful Transaction" pop up will appear if no issues. It will show the purchase amount, a masked number, the authorization code, and a transaction ID. If the charge attempt fails, it will show a Declined pop up with the reason it failed, or an error code.
4. Click the "Close" button to be brought back to the Room Account.
You will see your GuestPoint Pay transaction that you have just processed. The description will be different to Non-GPPay Transactions in the format:
Card Type - Masked Number with last 4 digits showing, Authorisation Code, Transaction ID.
You will see your GuestPoint Pay transaction that you have just processed. The description will be different to Non-GPPay Transactions in the format:
Card Type - Masked Number with last 4 digits showing, Authorisation Code, Transaction ID.

For easy visual differences, GuestPoint Pay transactions have a different "Refund" button replacing the usual "Reverse" button that you see on Non-GuestPoint Pay transactions.
5. Optional - If your Room Account is fully paid off, proceed to send the Room Account via Email, or Print it.
You will notice on the Room Account preview below that GuestPoint Pay transactions contain the masked credit card number where the last 4 digits show (in addition to an Authorisation Code & Transaction ID).
Showing the last 4 digits is an extremely handy quality-of-life feature for both internal reference and external guest references. It provides transparency on which specific card was used for the purchase.

The biggest difference between a GuestPoint Pay transaction and a non-GuestPoint Pay transaction is the Reverse button icon is a Refund button on GuestPoint Pay transactions. Typically the Description is quite different with GuestPoint Pay transactions having a masked card number, transaction code, and authorisation code.
Below image visually shows the difference between a GuestPoint Pay transaction and a Non-GuestPoint Pay transaction.
Below image visually shows the difference between a GuestPoint Pay transaction and a Non-GuestPoint Pay transaction.
Charging a Card with MOTO - When you don't have a Saved Card
You can still do a MOTO transaction with the "Charge" button even if you don't have a card saved against the Reservation.
This is the exact same process as you doing a MOTO transaction on a Non-GuestPoint Pay EFTPOS terminal (where you enter a purchase amount and the card details).
Generally, we do not recommend this method. The disadvantage with this method is it does NOT save the card details to the Credit Card Vault of the booking itself.
We recommend you add the card directly into the Credit Card Vault of your booking instead if you already have the card details.
Step by Step
1. In below example I do not have a card saved against the booking. The "Make Payment" screen looks like below when you do not have a card saved.
2. Select your "Payment Type" matching the card type of the card
3. Double-check the "Amount" field or input a purchase amount in the "Amount" field.
4. Proceed with "Charge Visa" button, you will see the Card Vault screen asking you to input the details of the card.
5. Enter the details and proceed with blue "Charge" button.
6. A "Successful Transaction" pop up will appear or it will show Declined if it fails with the reason or an error code.
Common Mistakes with GuestPoint Pay Payments
When you first start using GuestPoint Pay to take payments, there are a few common fundamentals to be aware of. Below is a list of common cases we encounter in Support.
1. Assuming GuestPoint will take a payment through GPPay when you use the "Save Payment" button
GuestPoint does not process a purchase through GPPay if you use the blue "Save Payment" button in the "Make Payment" screen.
You must process the purchase through the "Charge" button or the "Send to EFTPOS" button for it to go through GPPay.
A pop-up warning will display if you try to "Save Payment" when GPPay is available.

The "Save Payment" button is still used for payment types like Cash, Bank Transfers. It can still also be used for card payment types if you are using GuestPoint Pay without the integrated terminal option and using your own external terminal (often from a bank). In niche cases, it is used for adjustment purposes as well.
How to Verify if the "Save Payment" button been used instead of the "Charge" button
On a Room Account level, the easiest way to confirm a GPPay transaction is it will have a "Refund" button replacing where the usual "Reverse" button is.
On a daily monitoring-level: You can use your daily Roll Over process to confirm if the "Save Payment" button has been used instead of the "Charge" button.
When you use GuestPoint Pay, the Payments section of the Daily Balance Report from Roll Over will split into three columns: Payment Gateway, Other, Total
If "Save Payment" has been used, it appear in the "Other" column. In an ideal scenario, all card payment types should only have figures in the "Payment Gateway" column and a $0.00 figure in the "Other" column. This indicates all cards have been processed through GuestPoint Pay.
If figures do exist in the "Other" column for card payment types, it is recommended you investigate with a Payment Report.
GPPay Transactions often have a description with a masked card number, an authorisation code, and a transaction ID.
"Save Payment" transactions typically only have the name of the payment type in the Description.
The Payment Report would list all transactions showing the Description.
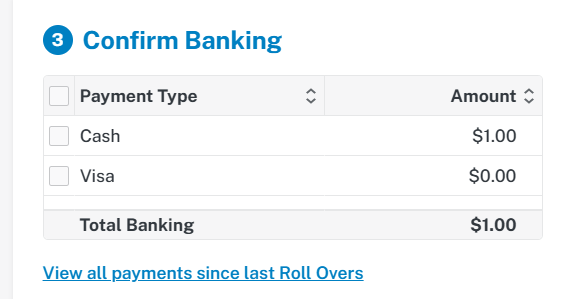
If you haven't done your Roll Over yet, you can quickly access the "View all payments since last Roll Overs" option which will bring this Payment Report up.
Look for different Descriptions and go to those individual reservation's Room Accounts to investigate deeper if required.
Related Articles
Refunding GuestPoint Pay Transactions
Quick Answer: Find the GuestPoint Pay transaction in the Room Account and click the red 'Refund' button. Enter the amount and confirm. Refunding a GuestPoint Pay Transaction Process full or partial refunds for payments taken through GuestPoint Pay. ...GuestPoint Pay Reports
GuestPoint Pay Reports Quick Answer: Go to Reports, select the report type, set your date range and filters, and click 'Preview'. Under the Reporting Section > Transactions. There is now an additional filter to only generate report based on Payment ...GuestPoint Pay Terminal Setup
Quick Answer: This article covers the physical configuration of the GuestPoint Pay terminal prior to integrating it to GuestPoint itself. Setting Up your Terminal 1. Unpack the terminal and dock and familiarise yourself with it. 2. Pay particular ...Summary & Statistics
Summary & Statistics Under management you will now have a dedicated tab for GuestPoint Pay. You can find this under Management: Go to the Summary & Statistics panel for a general overview on your GuestPoint Pay. It will show you Notifications, a ...Transactions
Transactions Quick Answer: This article covers transactions in GuestPoint. Under management you will now have a dedicated tab for GuestPoint Pay. You can find this under Management: Go to the Transactions panel to view all transactions made through ...