Guest Point Pay Terminal Setup
Quick Answer: This article covers guest point pay terminal setup in GuestPoint.
Setting Up your Terminal
1. Unpack the terminal and dock and familiarise yourself with it.
2. Pay particular care to the Cautions, Care and Storage instructions.
3. Setup the dock and place terminal on dock to charge.
Important! Total first-time charge period using the dock should be a minimum of 3 hours (whilst not being used).
4. Turn on the terminal.
5. Connect your terminal to your Wi-Fi Network:
Connecting to a Wi-Fi network
- Select the Menu button (3 horizontal lines) from the top edge of the display.
- Enter your Merchant Passcode (provided with your terminal)?
- Tap Settings > Communications > Wi-Fi
- Tap the Wi-Fi toggle button turn on Wi-Fi.
- Find the correct trusted Wi-Fi network you want to join and select it. Please ensure Terminal and the computer are on the same Wi-Fi.
- Enter the network password using the onscreen keyboard.
- Once the Wi-Fi password has been entered correctly, the Wi-Fi symbol will be visible in the status bar on the top of the screen.
- The icon will indicate whether the terminal has a strong or weak connection to the Wi-Fi network. If the connection is weak, either move the terminal closer to the Wi-Fi router, or you may need to install a Wi-Fi Extender to boost your Wi-Fi signal and range.
6. The terminal will need to be configured with your Guest Point System. Please contact Guest Point Support and this will be completed on our end.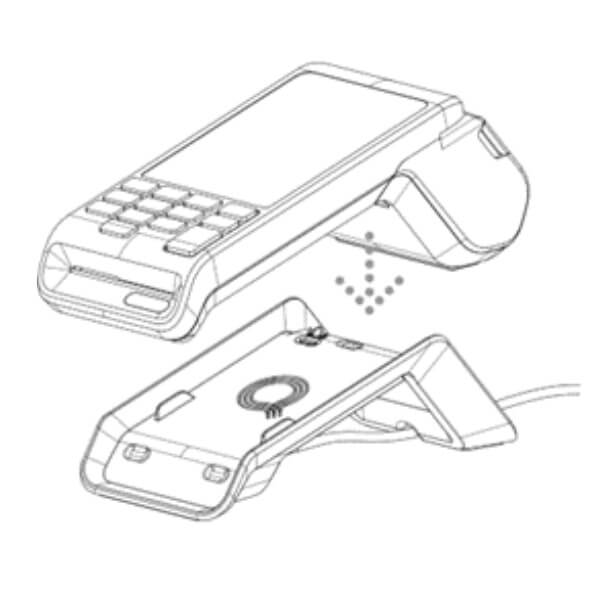
Related Articles
Related Articles
How to Setup Payment Links
How to Setup and Use Payment Links in GuestPoint This guide explains how to configure and utilize Payment Links within GuestPoint. Payment links allow you to send secure payment requests directly to guests via email. Because the guest is required to ...GuestPoint Pay Reports
GuestPoint Pay Reports Quick Answer: Go to Reports, select the report type, set your date range and filters, and click 'Preview'. Under the Reporting Section > Transactions. There is now an additional filter to only generate report based on Payment ...Error Codes
Error Codes Quick Answer: Look up GuestPoint error codes and their solutions. Host Error Codes: These errors are returned by the acquiring host! Response Code Response Text 00 Approved 01 Please call 02 Referral 03 Error Call Help - SN 04 Pickup Card ...Failing over to Standalone
Quick Answer: This article covers failing over to standalone in GuestPoint. Failing over to Standalone In the event that your integrated POS has a major failure and is unable to communicate with the terminal, you are able to change the terminal to ...Manual Payment/Refund
Quick Answer: Find the GuestPoint Pay transaction in the Room Account and click the red 'Refund' button. Enter the amount and confirm. Purchase Instructions 1 Enter the purchase amount into the purchase screen using the keypad and then press Enter. 2 ...