GuestPoint Pay Terminal Setup
Quick Answer: This article covers the physical configuration of the GuestPoint Pay terminal prior to integrating it to GuestPoint itself.
Setting Up your Terminal
1. Unpack the terminal and dock and familiarise yourself with it.
2. Pay particular care to the Cautions, Care and Storage instructions.
3. Setup the dock and place terminal on dock to charge.
Important! Total first-time charge period using the dock should be a minimum of 3 hours (whilst not being used).
4. Turn on the terminal.
5. You will need a 6 digit merchant PIN code. You should have this in the initial email sent to you containing your tracking number for the shipped terminal.
6. Connect your terminal to your Wi-Fi Network:
6. Connect your terminal to your Wi-Fi Network:
Connecting to a Wi-Fi network
- Select the Menu button (3 horizontal lines) from the top edge of the display.
- Enter your Merchant Passcode (provided with your terminal)?
- Tap Settings > Communications > Wi-Fi
- Tap the Wi-Fi toggle button turn on Wi-Fi.
- Find the correct trusted Wi-Fi network you want to join and select it. Please ensure Terminal and the computer are on the same Wi-Fi.
- Enter the network password using the onscreen keyboard.
- Once the Wi-Fi password has been entered correctly, the Wi-Fi symbol will be visible in the status bar on the top of the screen.
- The icon will indicate whether the terminal has a strong or weak connection to the Wi-Fi network. If the connection is weak, either move the terminal closer to the Wi-Fi router, or you may need to install a Wi-Fi Extender to boost your Wi-Fi signal and range.
7. The terminal will need to be integrated with GuestPoint. Please contact GuestPoint Support and we will complete this step with you.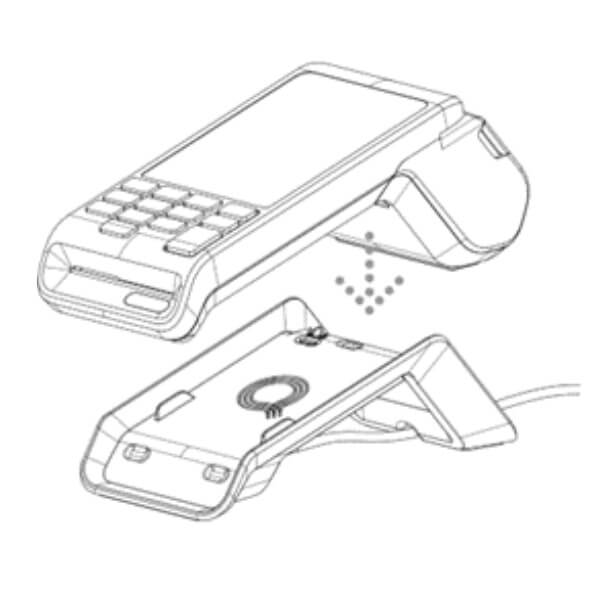
Related Articles
Taking Payments with GuestPoint Pay
Quick Answer: This article covers taking payments with GuestPoint Pay (GPPay). There are two main ways to take payments with GPPay on GuestPoint: 1. MOTO transaction through GuestPoint Pay - Using the "Charge" button in the "Make Payment" screen of a ...GuestPoint Pay Reports
GuestPoint Pay Reports Quick Answer: Go to Reports, select the report type, set your date range and filters, and click 'Preview'. Under the Reporting Section > Transactions. There is now an additional filter to only generate report based on Payment ...Refunding GuestPoint Pay Transactions
Quick Answer: Find the GuestPoint Pay transaction in the Room Account and click the red 'Refund' button. Enter the amount and confirm. Refunding a GuestPoint Pay Transaction Process full or partial refunds for payments taken through GuestPoint Pay. ...How to Setup Payment Links
How to Setup and Use Payment Links in GuestPoint This guide explains how to configure and utilize Payment Links within GuestPoint. Payment links allow you to send secure payment requests directly to guests via email. Because the guest is required to ...Summary & Statistics
Summary & Statistics Under management you will now have a dedicated tab for GuestPoint Pay. You can find this under Management: Go to the Summary & Statistics panel for a general overview on your GuestPoint Pay. It will show you Notifications, a ...